This article is based on the official Visual Studio Code documentation: Developing in WSL | VS Code Docs but extends it with a practical example.
Introduction and The Context
Let's say, you found a project on GitHub (or it's your own) that has to be accessed from Linux (WSL) using VS Code. This guide shows you how.
For example, I'd like to use WSL for editing YAML files (kubernetes deployments) with NeoVim, and "kubectl" util for managing kubernetes clusters. The reason behind is simple - Linux provides a lot of utilities that can enhance your experience with kubectl (like xarg, awk) and you can use bash (or any other) scripting language for automating your deployments.
So, let's say we have the "deployments" folder inside the user's home directory on Ubuntu (WSL):

In that folder, we have three YAML files (they are taken from Run a Replicated Stateful Application - MySQL | kubernetes.io example):

So, the goal is to access those files in VS Code, make a change to one of them and see the diff for the change.
Prerequisites
To achieve what we want some prerequisites must be satisfied - those should be already installed and configured on your Windows OS:
- Visual Studio Code (VS Code)
- Windows Subsystem For Linux (WSL)
Overview
Here are the steps needed to access Linux folders outside WSL:
- Install Remote Development extension for VS Code
- In VS Code, Press Ctrl+Shift+P, start typing and choose "Remote-WSL: New Window"
- Pick up a folder you'd like to open and press "OK"
Practical Example
Let's try to open our "~/deployments" folder. I'll skip the installation of the extension though. After pressing Ctrl+Shift+P inside VS Code and starting typing "Remote" we will see something like this:
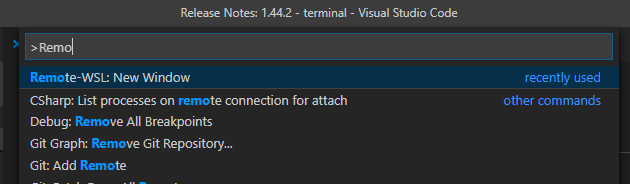
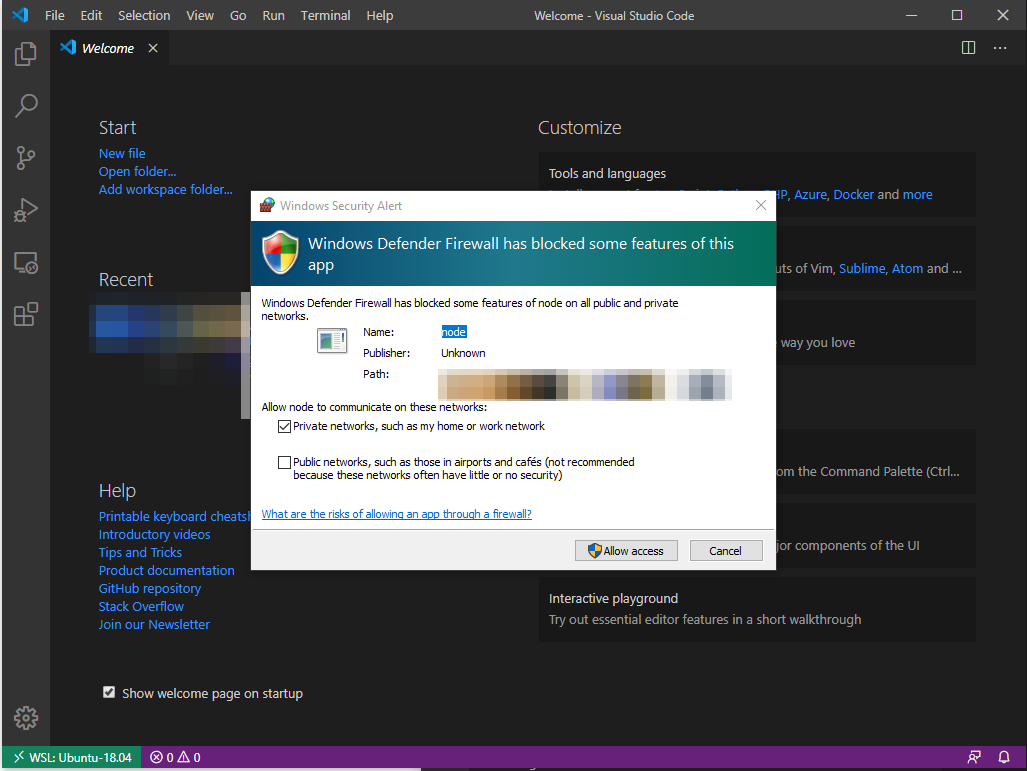
Here we should select "Remote-WSL: New Window". After selecting, a new VS Code window will be opened and it should ask your permission for accessing the network (or may not, depending on your Windows configuration):
After giving access to the network, we will see a familiar VS Code welcome window:
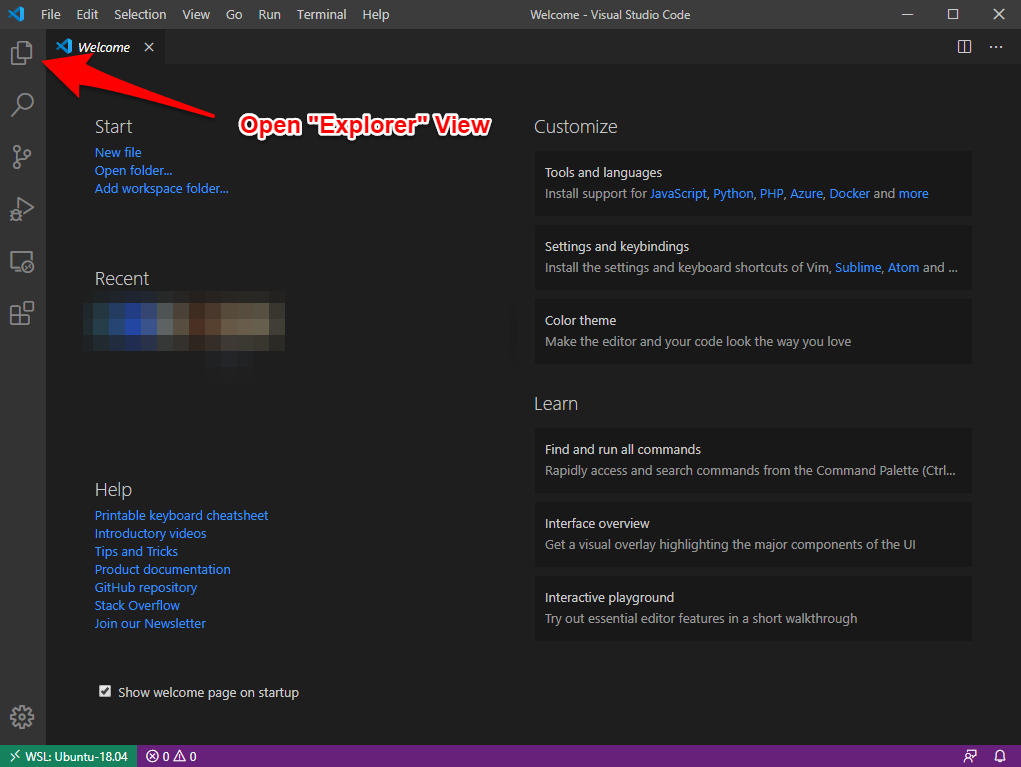
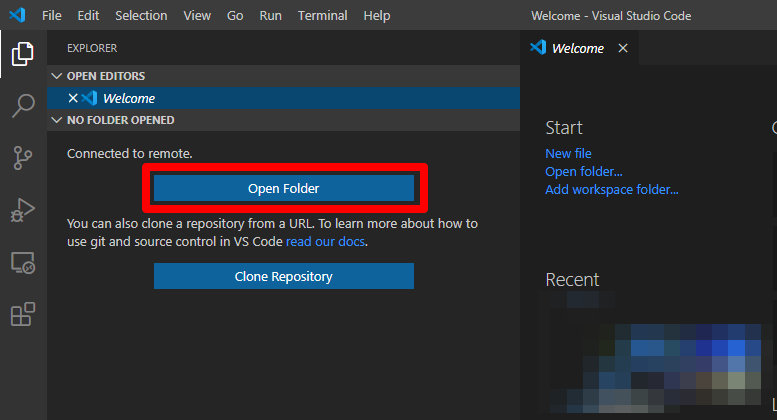
Here we should open the "Explorer" panel and click "Open Folder" button (it also possible to just press "Open folder..." under the "Start" section):
After that you'll see a Drop-down menu with a list of folders inside your home folder on WSL:
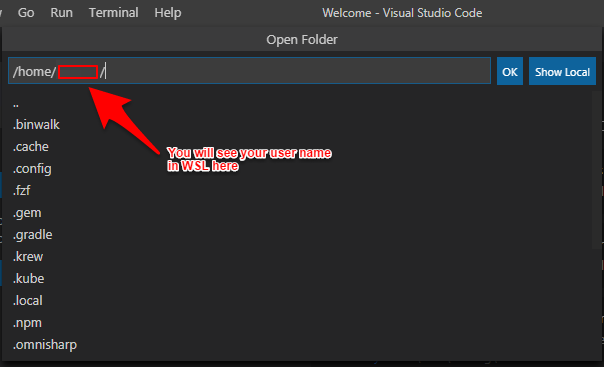
Then start typing a folder you'd like to open (in our case it's "~/deployments") and select it from the list:
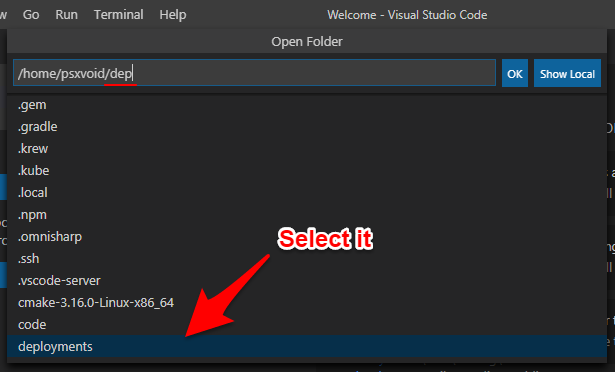
You'll see it populate the line with the requested path. The last step is to press the "OK" button:

And that's it! Now, you'll see all WSL files from the "deployments" folder in VS Code "Explorer" window as if they were opened in Windows:

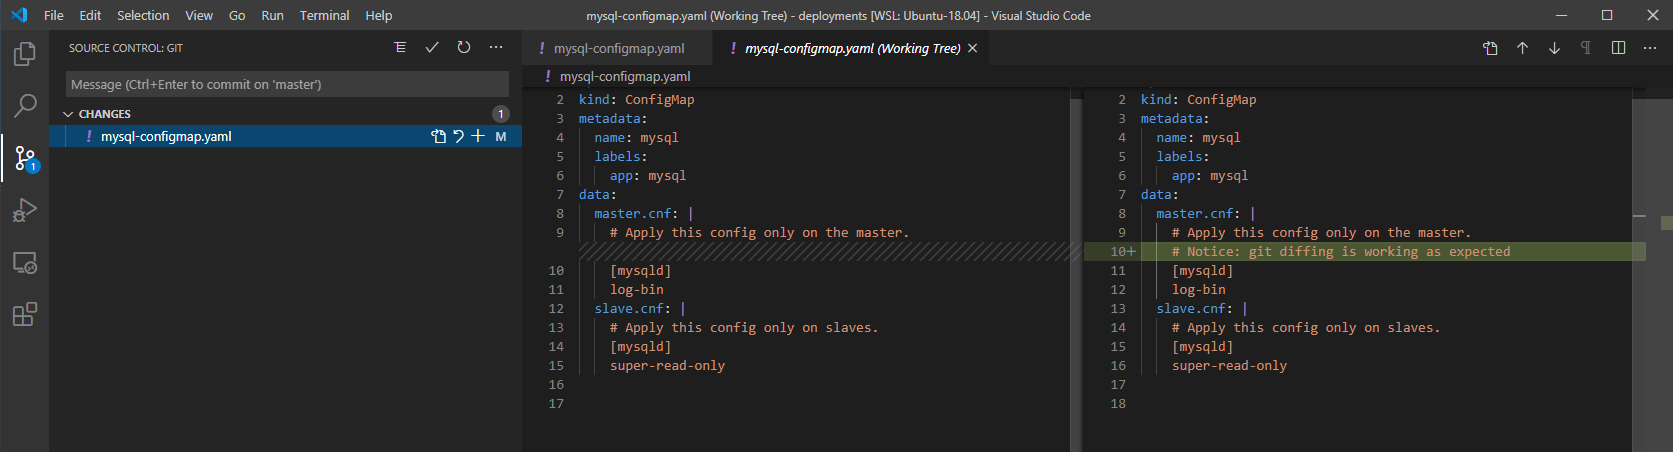
From here you could do pretty anything you could do with a project inside a Windows folder: open command prompt and run commands, use source control, debug, etc. Let's finish this example by making a change into one file and see that "diff" view is working as expected:
Conclusion:
VS Code and the "WSL Remote Development" plugin are powerful tools that can greatly improve your coding productivity and support complex development scenarios by allowing you to work with Linux files on WSL as if they were a part of a Windows file system. It abstracts all implementation details and allows you to focus on what matters.
Side Note: Also, be aware that the "Remote Extension" is not limited to working with files on WSL. For example, it can also attach to kubernetes containers. Check out the Visual Studio Code Change Log v1.44: Remote Development and the extension's page for more use case scenarios. Happy coding!