The Question: How to Write a DRY Unit Test for Any Class With Any Complexity using xUnit?
Notice: this article doesn't pretend to be the holy grail and represents my personal opinion which is a result of many experiments on the subject
The Short Answer
Use custom BeforeAll class with hierarchical inheritance as xUnit class-fixture and nested classes for a test organization.
The Long Answer
The "Why" (Introduction)
In the past year, I switched from .NET/C# to TypeScript. It's dynamically-typed language (when it compiles to JS), meaning you spend less time dealing with strange compilation errors. Instead, you write your code, open the browser, and see the results almost immediately. Though, a dynamic language has it's own benefits, as professionals we still have to write tests for our code. So, did I. I used Jest/Jasmine frameworks for testing TS/JS code, and it's fantastic. So far so good, until I've started another personal project. For it, I decided to write the logic using C#/.NET. And because I usually use TDD/BDD approaches during the development, it quickly became apparent that I miss the convenience of nested scenarios and steps from Jest/Jasmine.
Though in .NET there are BDD frameworks available - like SpecFlow, xBehave (and possibly more); but I wanted something simple to use with xUnit - with no other dependencies. xBehave depends on xUnit itself, but its repository is already archived. SpecFlow is great, but it seemed too cumbersome for a small project I was about to start. So the question arised: Can I use the same style with xUnit? And after a couple of experiments the "yes" answer appeared.
But before going further, here is a short list of requirements I kept in mind:
- Do not introduce any attributes, reflection and other advanced concepts - keep it simple
- Unit tests should be DRY - as less code duplication as possible
- It should enforce a single assert per act
- It should be open to code refactoring and modifications
- Allow writing tests mechanically in a standardized way
The main advantage of Jasmine/Jest frameworks is that you can write tearUp/tearDown blocks which can be run before each and before all tests. Here are xUnit similar constructs:
beforeEach<-> class constructorafterEach<-> class DisposablebeforeAll<-> IClassFixture
Despite having similar constructs in xUnit, Jasmine/Jest allows you to nest beforeEach/beforeAll blocks indefinitely, which allows you to reduce code duplication to a minimum. But can we achieve the same in C#/xUnit?
After experimenting, I've found a more or less satisfactory way of doing it. In C# similar results can be achieved using nested classes. I'll omit all experimental steps and show you the final result instead, after describing what I don't like in just having "Fact" inside a single test class.
"Soaking Wet" Tests - The Issue
So, coming back to C# again. I've started writing a new project in C# using BDD/TDD approach as I do normally. But then I thought, can I write my tests in a similar way in C#?
Before that I used a special naming of test methods for xUnit:
[Fact]
void MethodUnderTest_TestCondition_ExpectedResult()
{
    ....
}
It looks some kind of OK, but a complex scenario similar to Jasmine/Jest will look like:
[Fact]
void HandleAppGlobalCommand_AndPayloadIsHandleEscapeButtonAndCloseOnEscapeEnabledAndSearchBarIsHiddenAndEditingIsNotStarted_ShouldCloseThePopup()
{
    ...
}
And it is already pretty hard to read and understand. Probably, for tests in such a style there would be a lot of code duplication. And soaking wet unit tests will probably have a negative effect on any product. Also, in such tests there is a huge amount of code duplication, which also can be hard to support.
So, how can it be improved? Using xUnit you can provide those arguments as InlineData attribute:
[Theory]
[InlineData(PayloadType.HandleEscapeButton, true, true, false, true)]
...
void HandleAppGlobalCommand(PayloadType payload, bool closeOnEscape, bool searchBarEnabled, bool editing started, bool expectClosePopup)
{
    ...
    Assert.Equal(expectedClosePopup, result);
}
It's much better, we now share the same scenario between multiple tests by parameterizing them. But then, what if I would like to test an invalid state of the method when something throws an exception in the middle?
If you put the entire test setup in this test method, then most likely you should duplicate this test method and rewrite the only last assert:
[Theory]
[InlineData(PayloadType.HandleEscapeButton, true, true, false, true)]
...
void HandleAppGlobalCommand(PayloadType payload, bool closeOnEscape, bool searchBarEnabled, bool editing started, Type expectedException)
{
    ...
    Exception exception = Record.Exception(() => act());
    Assert.Equal(expectedException, exception.GetType());
}
But it has other cons:
- Sometimes it's cumbersome to parametrize such test methods using the "Theory" attribute.
- Often, it requires a lot of mental energy because of the unique behaviour of classes under the test - meaning you can't write tests "mechanically".
Crispy DRY Tests - The Solution with an Example Code
Let's imagine that we are working on a game where the main hero is Mario. Nothing special except he can be possessed by the spirits of elders.
And those spirits from time to time can decide what Mario should do, and occasionally take control over Mario's body:
and this decision is made somewhere in the game's code by calling mario.DecideWhatToDo() method, which looks like this:
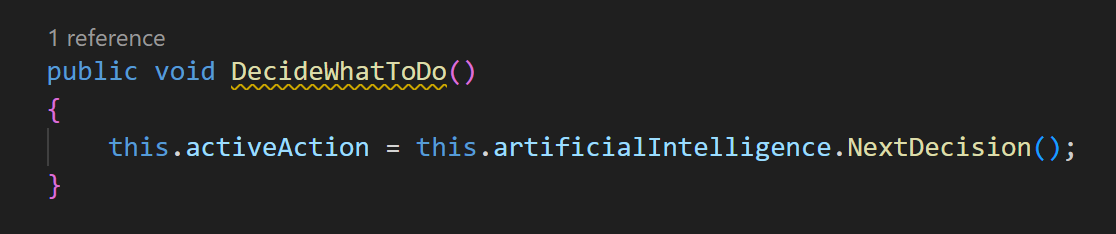
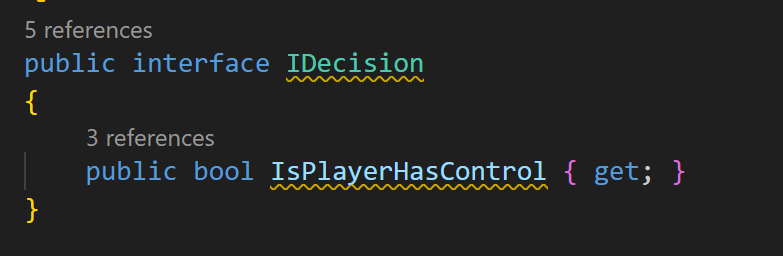
All this method does -it sets a new IDecision value we saw above to a private activeDecision property of the MarioPossessedHero class. This property is defined as:

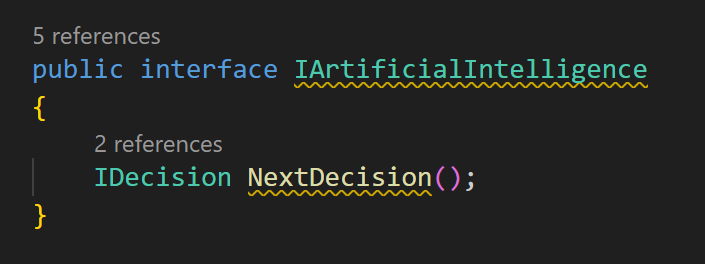
Notice, this decision makes artificial intelligence, which looks like this:
The System Under Test (SUT)
Now, what we will do next - is to test how our hero jumps in different situations - to be more precise - when he possessed or not.
I'll skip the actual BDD process, and will show the final code for that method:
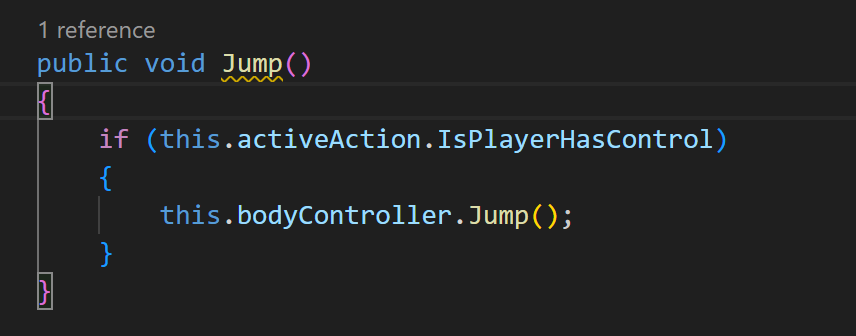
It's pretty straightforward, we can see, that depending on the AI decision our Mario sometimes can ignore a player's "jump" command.
And when it does not ignore it, it just calls this.bodyController.Jump() method which in turn controls the actual behaviour of Mario's body.
Here are how scenarios for the jump method may look like:
GIVEN Mario is possessed
WHEN a player presses "jump"
AND the artifitial intelligence has no control over Mario
THEN the Mario should jump

GIVEN Mario is possessed
WHEN a player presses "jump"
AND the artifitial intelligence has control over Mario
THEN the Mario should not jump

GIVEN Mario is possessed
WHEN a player presses "jump"
AND the artifitial intelligence decision throws an error
THEN the Mario's "jump" method should also throw an error
I'll omit the complete test code - for simplicity, here is the code only for the first scenario; you can find the rest in the linked repository here:
public static class Jump
{
    public abstract class BeforeAll : Methods.BeforeAll
    {
        public Mock<IDecision> Decision { get; protected set; }
        public bool IsPlayerHasControl { get; protected set; }

        protected BeforeAll()
        {
            this.Decision = new Mock<IDecision>();
            this.Decision.SetupGet(x => x.IsPlayerHasControl).Returns(() => this.IsPlayerHasControl);
            this.ArtificialIntelligence!.Setup(x => x.NextDecision()).Returns(() => this.Decision.Object);
        }

        public override object? ActFunc()
        {
            this.Sut!.Jump();
            return null;
        }
    }

    public static class AfterAiMadeDecision
    {
        public abstract class BeforeAll : Jump.BeforeAll
        {
            protected BeforeAll()
            {
                this.Sut!.DecideWhatToDo(); // update the decision from AI
            }
        }

        public class PlayerHasControl : IClassFixture<PlayerHasControl.BeforeAll>
        {
            private readonly BeforeAll fixture;

            public class BeforeAll : AfterAiMadeDecision.BeforeAll
            {
                public BeforeAll()
                {
                    this.IsPlayerHasControl = true;
                    this.Act();
                }
            }

            public PlayerHasControl(BeforeAll fixture)
            {
                this.fixture = fixture;
            }

            [Fact]
            public void ShouldNotThrow()
            {
                Assert.Null(this.fixture.ActException);
            }

            [Fact]
            public void ShouldTriggerJumpForBodyController()
            {
                this.fixture.BodyController!.Verify(x => x.Jump(), Times.Once);
            }
        }
    }
}
Notice, how classes are nested and inherited - they use the following rules:
- All classes that contain "BeforeAll" nested classes should be marked as static - their purpose is to logically separate test steps - similar to
describeblocks in Jest/Jasmine.
Static classes also protect from accidentally putting "Facts" into the wrong place - "Facts" should be put in non-static classes - All
BeforeAllclasses (fixtures) inside static container-classes- should be marked as
protected abstract- it protects them from the accidental instantiation of the wrongBeforeAllblock inside xUnit class fixture - the top-level
BeforeAllclasses for the method (e.g. insidepublic static class Jump) must overrideActFunc- so the act is always the same for all tests - non-top-level
BeforeAllabstract classes should define intermediate spec steps (e.g.Jump.BeforeAll)
- should be marked as
- All
BeforeAllclasses inside non-static test classes- should be marked as
public(non-abstract) and also have apublicconstructor - should call
Actmethod inside the constructor as the last step
- should be marked as
- Non-static test classes
- Contain the actual "Facts" as well as the public non-abstract class
BeforeAllwhich defines intermediate scenario steps - Inherit from
IClassFixture<T>and inject the fixture via constructor - it allows to run an "act" once for all asserts/facts
- Contain the actual "Facts" as well as the public non-abstract class
- While inheriting from a parent
BeforeAllfixture, use<ParentStaticClassName>.<BeforeAll>naming scheme to avoid ambiguity
(e.g.BeforeAll : Jump.BeforeAllinside staticAfterAiMadeDecisionclass)
Summary
And that's everything we need to cook crispy DRY tests in xUnit. Yammy, isn't it?
Notice, those steps aren't ambiguous, and there is almost no code duplication.
Pros:
- No code duplication
- Single assert per test
- Minimal runtime overhead per assert (faster unit tests)
- Goes nicely with refactoring
- Unit tests are much cleaner and easier to understand
Cons:
- A bit longer learning curve - certainly requires a shift in thinking about the structure of your tests
- A bit harder to work with tricky inheritance - not a big deal when you understand what you are doing
Other notes:
- Can "BeforeAll" be used to test static methods? Not without some thought and modification, but in my opinion, xUnit tests "as is" are already good for testing static methods in BDD style - using constructor and/or nested classes (no base class required).
- Can it make your code better? No, if you do not follow best practices in software development, not a single unit test framework will help you.
P.S.: I was able to use this approach with more advanced/complex usage scenarios in integration tests, where each step involves intermediate asserts and setups. For such tests, I wrote a BeforeAllSequenceFixture which allows to have all the described above benefits for a sequence of steps. But I'll leave it for another article.
The repo containing full code for this article can be found here: psxvoid/crispy-dry-xunit-tests-article | github.com